Friday, June 29, 2012

Refurbished Door Headboard Reveal!

A friend of my daughter's just moved into an apartment in Manhattan. She is a recent college grad and will be working through a two year program at Pace. She decided that she was done with dorm decorating and was looking for a more sophisticated way to decorate her new apartment- basically her bedroom, since the apartment is shared with two others. Like many, she turned to Pinterest and fell in love with the whole refurbish-recycle look. She went on Craigslist and found assorted old chippy architectural pieces like doors, shutters, various shelves and an old window that someone had turned into a mirror. How fun is that? Wouldn't it be fun to be twenty-two again?


She was inspired by the above photo and I used it back when I did the post  Recycled Door Headboards. Check that out if you would like to see more headboard inspiration. I couldn't wait to tackle the project of refinishing the doors and getting "the look" that she wanted for her new space.


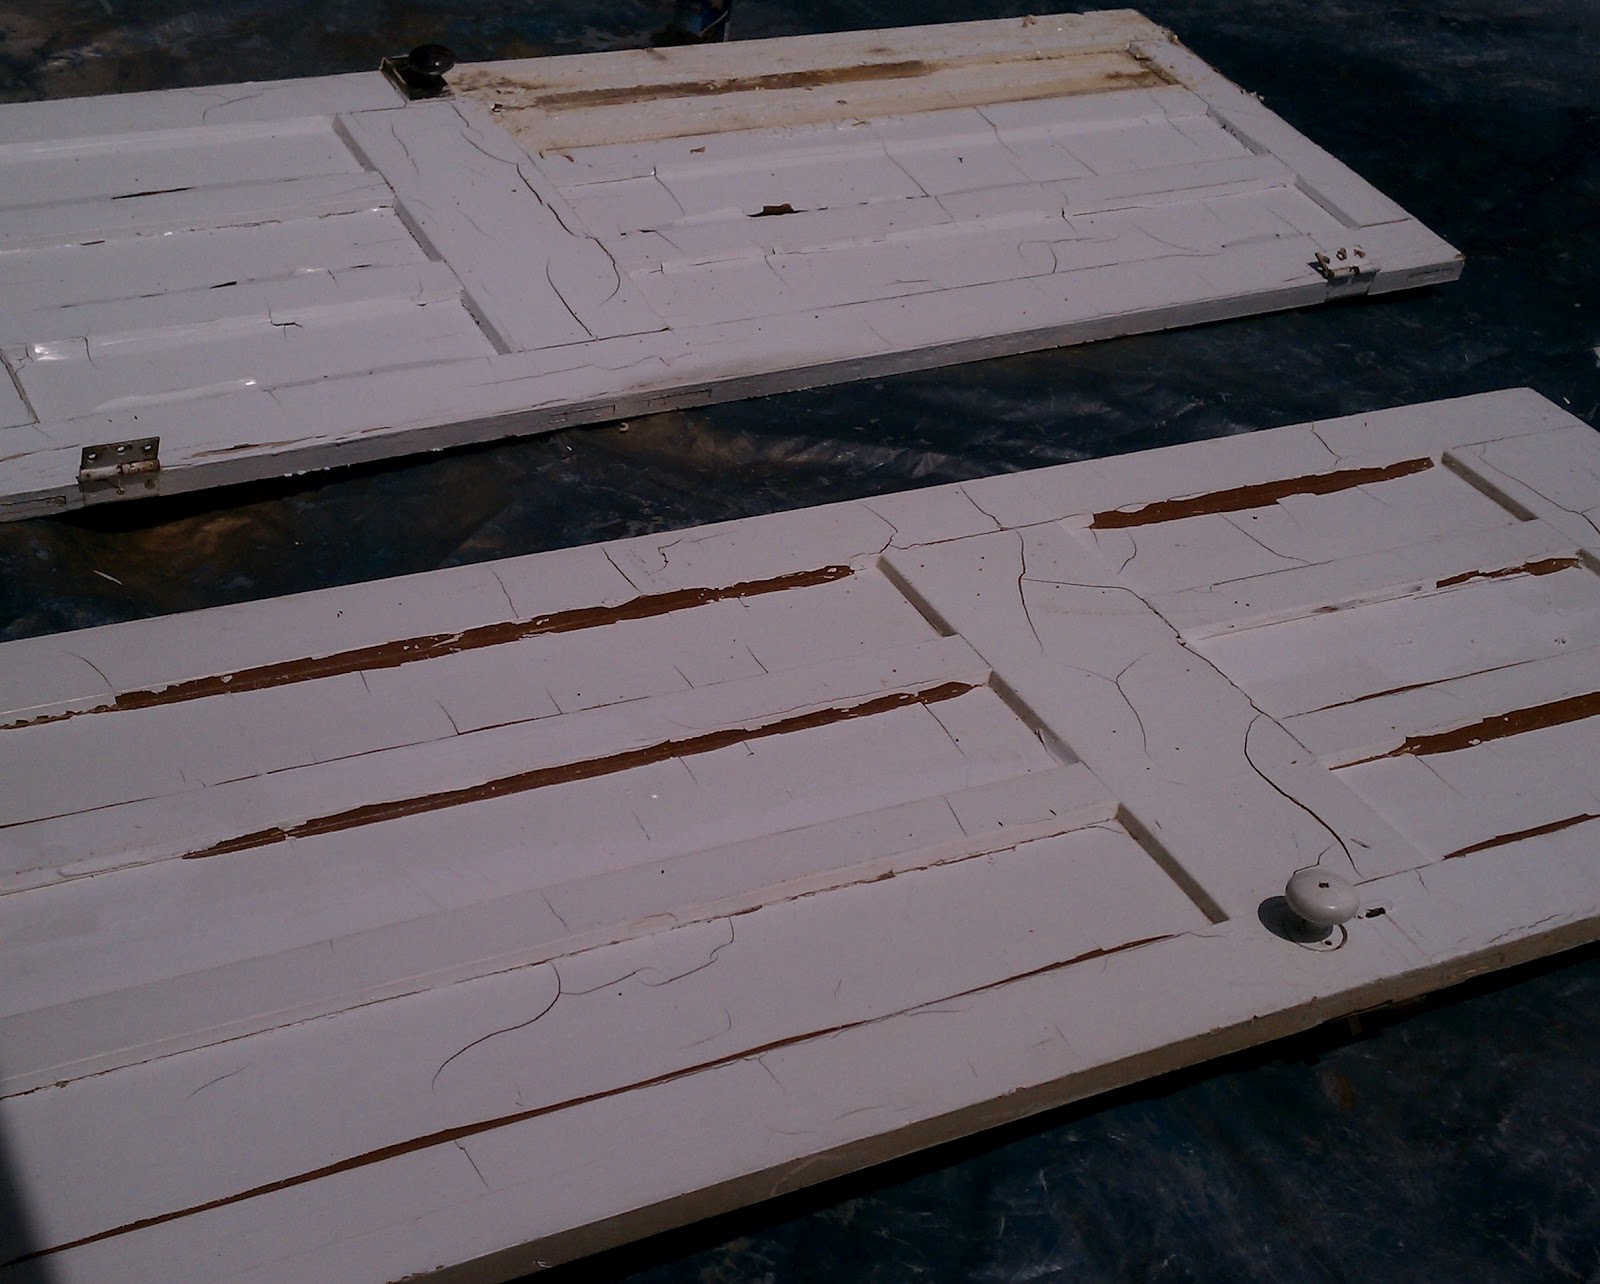
When I got the doors this is what they looked like. 


Immediately when I painted on the paint stripper, the first layer of paint started bubbling up.


Working a small area at a time, using a 2" putty knife, I just started to scrape off the paint.


Once I was satisfied with one area, I moved onto the next.


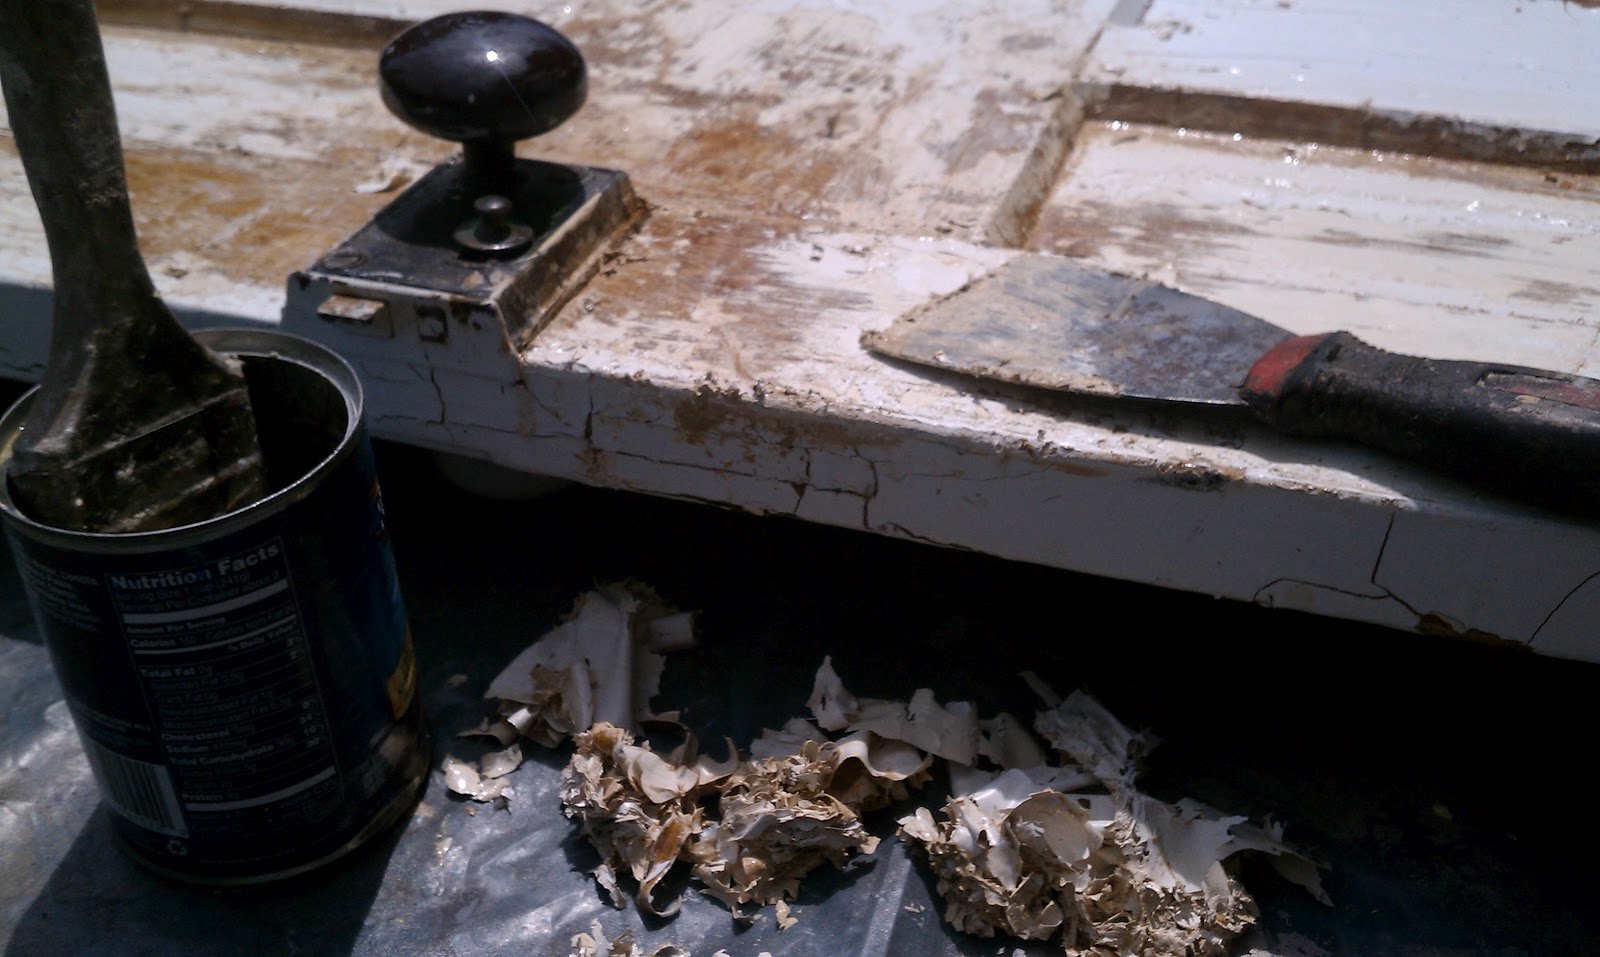
I poured the stripper into an empty soup can because it evaporates very quickly. 


Every now and then I would stand back to access the entire door -scrape a bit more here and there- until I was satisfied with "the look". Then I cleaned it up good with some mineral spirits and a steel wool pad. After it dried I went back and made sure there were no loose pieces. Chances are it was lead paint so I was sure to wear a mask through the whole process and then finish with a light sealer.


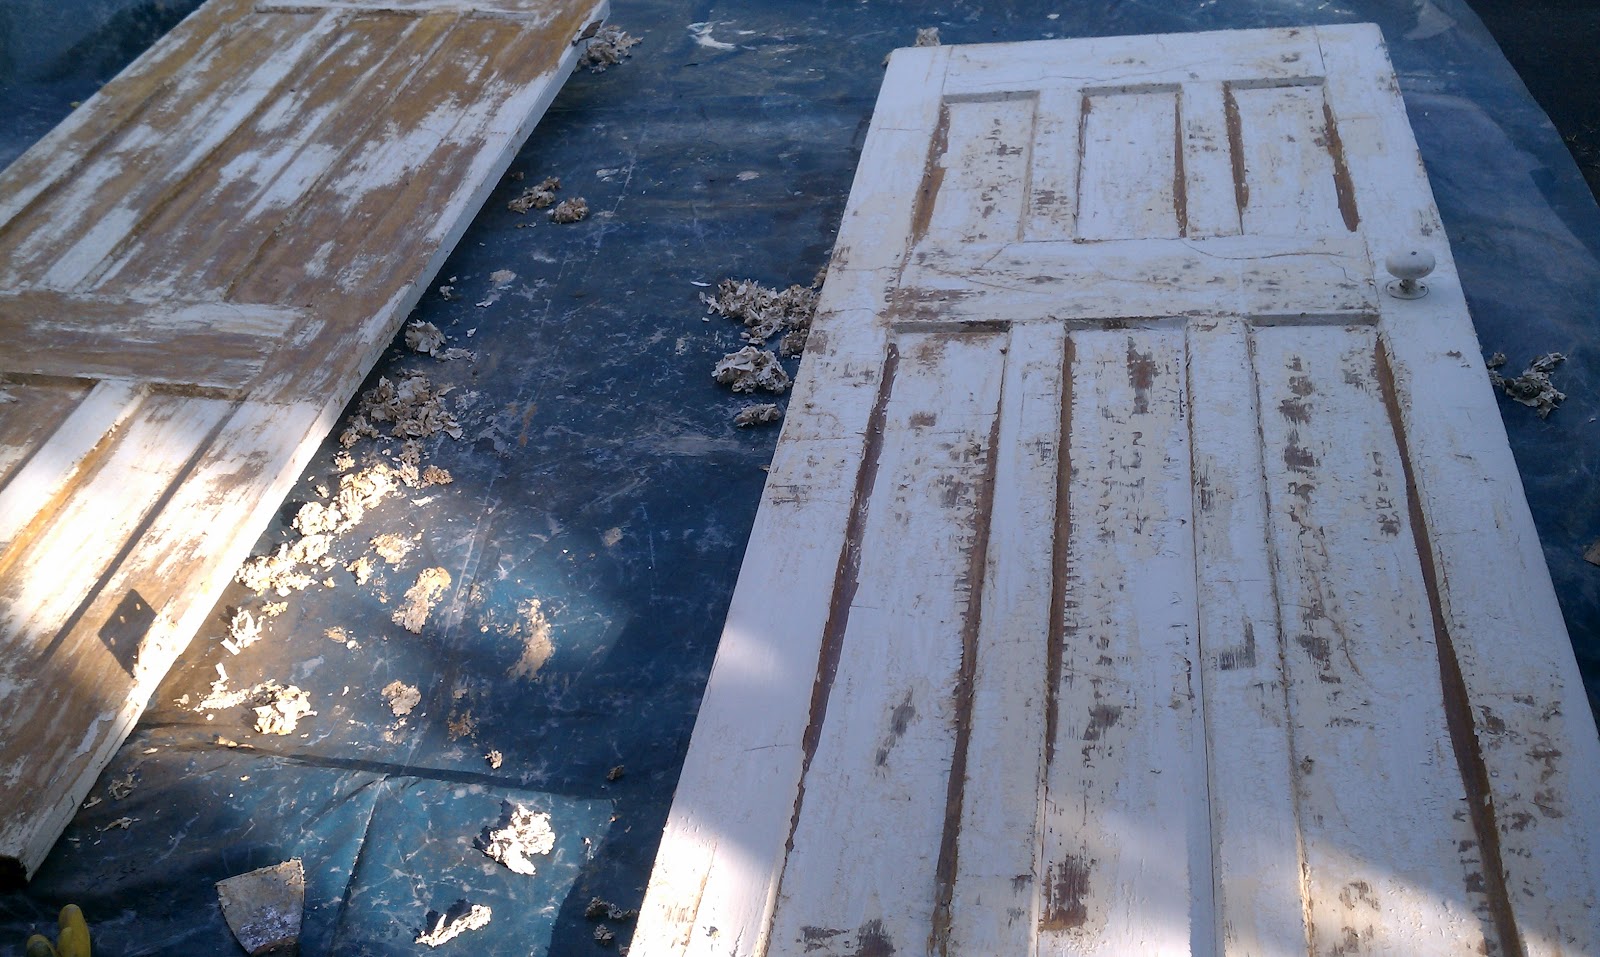
Onto the second door...same story!


Here are the finished doors!
If you're wondering why I didn't do them with the door knobs either together or on both on the outside it's because the opposite side of the doors were covered with some sort of contact paper underneath the layers of paint. I guess that was not an uncommon practice years ago and it would have been fine if I wanted to completely strip the doors down...but I needed that deep down layer of paint!

And here are the doors in their new home!


Don't you just love them? 


She and her mom did a great job accessorizing the space. How awesome to have an old fireplace in your room- a great place to display her old window/mirror!


...AND a view with lots of natural light! She is off to a great start...I can't wait to get down there in a couple of weeks and see it for myself!

Monday, June 25, 2012

My New Dough Bowl- That I WON!


My new dough bowl!

So maybe from the title you can discern that I am pretty excited. It's not only that I am now the proud owner of a one of a kind European treasure but the fact that I actually won it, that I actually won anything, just sweetens the deal! 


Since I started blogging over a year ago, I've been following the amazing construction of The Enchanted Home- the blog, and literally, an enchanted home! Tina, the owner of both, started a blog where she so generously allowed us readers into her home as it was being constructed, where she aired her design decisions (even asking for input occasionally), where she shares her favorite places, products and a seemingly endless collection of inspiration photos of homes and gardens from around the world. 

Oh, and one other thing...
 she has amazing give-away's like this dough bowl from her shop 
THAT I WON! 

I love how the label says "100% Found"


Inside and out she's a beaut!

The rustic details make it so interesting- what do you think this is for? 

I actually do make my own pizza dough so I think I'll give it a try.

I really just love the idea of using an old piece for it's intended purpose.
Kind of like I'm carrying on some sort of history.

Here are a couple of my other favorites from her shop:

Picture
One of the many needlepoint pillows I love.

Picture
Tina and I share a love of blue and white porcelain.


Picture
Even though I'm about to kill the squirrel that incessantly visits my bird feeder (not really- I'm all talk), I have to admit that they can be adorable. I love the little acorn scoop that comes with this carved mango wood bowl.
Picture
...and just look at these charming little measuring spoons!
There are so many beautiful accessories like silver and monogrammed linens and candles to name a few but my other favorites are the garden statuary and planters.

Picture

 Picture


Picture 

Some seriously stunning stuff! 

Take a minute and visit her shop, The Enchanted Home Shop, you'll be glad you did and when you really have some time to relax, sit back and read some of her blog, especially those Thursday updates where she posted tons of pictures of her truly extraordinary home (below).
 

Hope you are enjoying your Monday!

Wednesday, June 20, 2012

Saving Your Kids Artwork

multiple frames
via

Today is the last day of school for my kiddie poos-yeah!!! Schools Out For SUMMER!
All this week my second grader has been bringing home the masterpieces- all of those works of art that have been compiling at school -in the classroom and in the art room. 
I recently read an interesting article on organizing all of those works of art and I suppose this would go for writing pieces as well.
Simply create four piles- one to keep in a memory box, one to frame, one to give away for gifts to the special people in your child's life and one to throw away. I thought it was interesting that the article talked of the importance of having your child in on the decisions, especially the throw away decisions (even if you secretly throw away more than they realize) but it's important to teach them how to let things go and that it's okay and even quite necessary. A lesson that I still struggle with sometimes.


Here are a bunch of good ideas for displaying:

childrens art display on clipboards
via
Clipboards make quick changes easy


Google Image Result for http://macmillanframing.com/yahoo_site_admin/assets/images/kids-art-work.59133911_large.jpg
via
Art mixes right in with family photographs on this gallery wall.


Childrens art photographed, resized and printed for framing...love this and will be doing this!!
via
A cool way to display and remember several pieces-
scan individual artworks and shrink them with photo editing software.
more ways to display childrens art
via
Matching frames and mats unify this collection.


A small bite of mondocherry: framing my children's art...http://mondocherry.blogspot.com/2012/05/framing-my-childrens-art.html#
via

Frames filled with cork board for kids artwork and writings- instead of pinning on fridge, hand on the wall and have constant changing wall art!
via
Framed cork boards is another way to have a permanent display that's easily changed.

hanging art
via
This system also allows for quick changes as well as piling on!
Childrens art display
via
I think this is my favorite!

One hour left before they are home (only a half day today) and temps are pushing 100 in sunny Syracuse. Summer vacation is going to start with a splash- literally! 
I think I'll be sitting poolside soon :) 
Enjoy your day too!

Monday, June 18, 2012

Pets and Decor

How was your Father's Day Weekend? 
We had a small family BBQ and the weather could not have been better! I made my dad a simple little gift that he seemed to really like- I posted it on my Facebook page if you want to check it out. 

Today I'm hoping to inspire you with some fabulous interiors that have a little something extra- an amazing pet! I'm not sure if it's because I have neither a cat nor dog and a part of me reeaaallly longs to or if everyone is drawn to these types of photographs. Pet photos are usually adorable but in my opinion they achieve "Art" status when the setting or background is a gorgeous interior!
Let me know what you think!

dog
via
Love the Black framed photograph over that sumptuous charcoal-colored leather! 

dog
via 
Really the kind of bed you just want to fall into!

dog.
via
Eclectic entry area

cat.
via
Oh my, my, my- I do love that space!


dog.
via
Using refurbished furniture adds such character and warmth to a space.


dog.
via
I love the idea of having a built-in pet bed in the mudroom.


cat.
via
Hello Kitty- Can you tell me what color is on the wall- I think I want to copy it!


dog.
via
Desire to Inspire blog has a Pets on Chairs series.
 

dog.
via
Gotta love summertime!

What did you love more... The designs or the pets?
 
I've started a Pets and Decor album on one of my Facebook pages and collected a bunch of images on my Pets and Decor Pinterest Board as well. 
I'm telling you I'm infatuated! 
I've been thinking about setting up a Linky Party so that Ispirato Design readers can show off their own pets and interiors or interiorscapes (or gardens).
What do you think- would you like to see that?

Friday, June 15, 2012

Sea Glass

Don't you just love the beautiful and serene colors of sea glass?

sea glass


I was so excited when my husband and I first discovered it so many years ago while walking along the beach. We quickly realized that we weren't the only ones and within a matter of a few minutes we were in an all out competition with seemingly professional sea glass pickers. We started getting up early because we overheard  the professionals talking about how good the picking was and we found ourselves racing them to the beach at sunrise.

Even though I love it, I cringe now when I see bags of it at the craft store and refuse to buy it. 
I have my own little stash and it's special!

Anyhow, if you also love the frosty colors of sea glass you may want to try this really, (and I mean really), simple DIY


These were clear glass candle holders. I painted them with a mixture of Mod Podge and food coloring. To be honest, I put very little effort into them  because I didn't think it was actually going to work. When I first started painting them, they were all streaky and I just wasn't loving them but when they dried they actually looked very pretty and the streaks don't show.


Here is the original tutorial that I followed. 
via Elizabeth Mathews
The best part is, when you want to change them- just soak them in water and it all washes off. If you don't want them to be temporary I suppose you could use a sealer.


diy sea glass tutorial
I also found this tutorial HERE
Check them out- It might be a fun little project for over the weekend and trust me the kids will love making them. 

Have a great Father's Day weekend!

Wednesday, June 13, 2012

Mother Nature is the Boss!

Along our front walk we have three rose pillars planted with "Golden Showers" climbing roses. "Golden Showers" is considered a very fragrant, semi-double, yellow climber. It blooms repeatedly throughout the summer and I like it for this particular spot because it tolerates shade very well.


A year ago, after a very cold winter with very little snow cover, the roses on the two outer pillars appeared to die. From experience I knew they might come back if I left them and since I had no intention of immediately buying new ones- I had the time to wait it out.


Just as I hoped, new shoots shot up this spring!


And voila! Wait...what is this?!


As you may have noticed, the shoots came from deep in the ground. The rose literally went back to it's roots (so to speak). "Golden Showers" is a hybrid, descending from rosa "Captain Thomas"- also a yellow rose, and rosa 'Charlote Armstrong"- a Deep Pink Hybrid Tea- AHA!  


I actually really like the color of this new rose and it has worked out perfectly that the two outer roses are reverting back to their red roots- 
I truly prefer this new design. I admit defeat- 
Mother Nature knows best!